

A customer near Reno, Nevada got in touch. He wanted an aggressive 8 ft. grizzly to greet his guests as they enter his ranch. He originally wanted a wood bear, but I suggested doing a foam bear since this had to be shipped and installed. Also, a foam bear will allow more details to capture realism. We started with this sketch.

Next, I drew a 1 ft. grid to transfer the sketch onto the block.


Once the lines are drawn, then I can take my big bar electric chainsaw and start cutting off large chunks. Then, I move to my smaller battery chainsaw to do the finer details.


After finishing with the electric chainsaws, I move on to these tools to create the textures and details.


I used epoxy clay (Aves apoxie sculpt) and epoxy putty (Smooth-On Free form air) to create the eyebrows, lips, tongue and claws. I ordered a grizzly mouth set and eyes from McKenzie Taxidermy Supply.


When, the carving was done, we applied a polyurethane based hard shell to give a protective and smooth finish to the foam. It is an A/B one to one mix that gets brushed on. It’s called styrospray 1000

I used smooth on’s UVO urethane color to tint the hard shell coats.


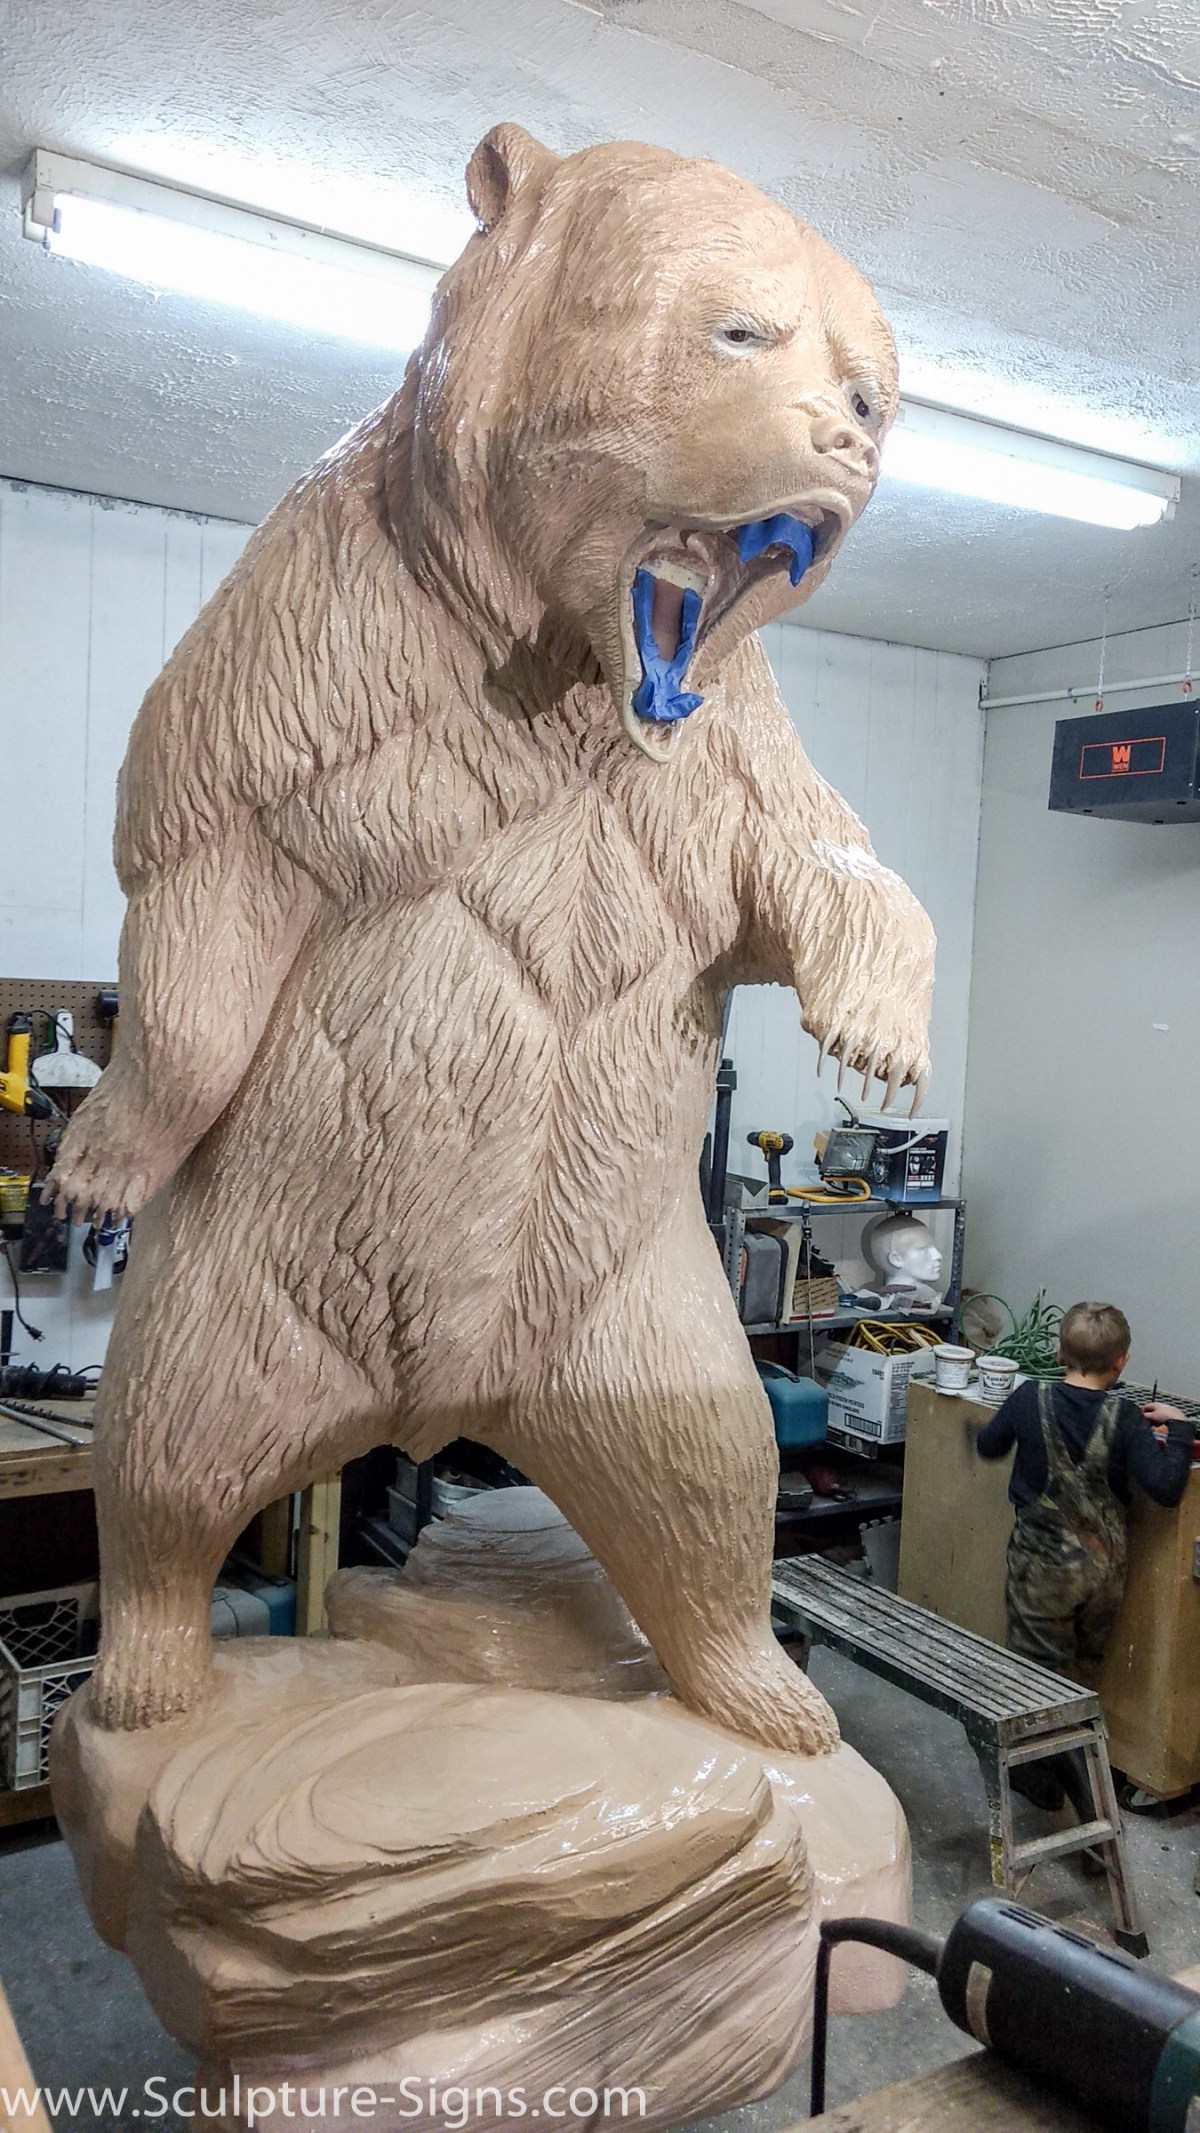
After the layers of hard shell were set, a base coat of black was applied and then 3 layers of browns dark to light were airbrushed and hand painted to create the fur. The rocks were painted with black, white, blue and tan. Then, layers of clear, flat, polycryl were added over the paint to protect it. Lastly, a krylon clear matte spray was applied to dull out any sheen.


After painting was complete, it was time to carve a cradle for transport and take this guy for a drive to his photo shoot at the farm!


Check out this video of the step by step process in time lapse speed.
Thanks so much for taking the time to look at this. If you enjoy these posts, click the “follow” button for post updates.
If you have an idea for a custom sculpture or 3D sign, click the contact page to get in touch!!
Fantastic job Kris! Thanks for keeping us in the loop!
If I saw this big guy in someone’s driveway, I think it would be a long time before I came back. Especially if it were at night. Great job Kris!