

A retired military customer commissioned a 7 ft. long f18 fighter jet for his house in Waterbury, CT. This would be spending alot of time outdoors so I decided that epoxy resin over foam would be a good choice because it is weatherproof, lightweight, shapable and sandable…
We met together and discussed the details of the plane – decals, colors, functionality (clear cockpit that opens and wheels that work.)

I started by ordering a custom block of 2 lb. EPS Foam from a foam manufacturer in Hartford…


Then, using the reference photos, starting making cuts into the block with my chainsaws. Next, I move to a rasp and sandpaper to start shaping and smoothing the form. I use gorilla glue expanding foam glue to glue pieces together.


Once the form is done, the next step is painting on a thin layer of foam coat. This is a powder mixed with water that dries rock hard and seals the surface of the foam. This allows sovent based products like epoxy, body filler and spraypaint to be put on top of the foam.
After foam coat I started painting epoxy resin all over the plane with a brown filler to thicken the coat.


The resin does a nice job of self leveling, but doesn’t completely smooth out all the surfaces, so this is where body filler is used to finish smoothing. This process of epoxy, sand, epoxy, sand, epoxy, sand, filler, sand, filler is not a fast process. This plane took around 100 hours to complete.


This is my new assistant, Lucian. Lucian is a talented sculptor (a graduate from Lyme Acadamy of Art). He has had some great experience in the craft of glass etching, mold making and casting, modeling in clay…


finally, it was ready for the grey spray primer!

One of the major challenges of this project was creating a clear cockpit canopy. I started with a form made of foam, foam coat and body filler.


Next, it took about 10 tries to get a successful canopy. The process was to heat the oven to 250 F. Then put a thin sheet of clear plastic into a frame and set it in the oven for 2 to 5 minutes, then pull it out, set it on the form and use a plywood ring to push it down over the form. Many times the plastic got wrinkles. I experimented with 3 different plastics and 3 different thicknesses. I used youtube for inspiration and instruction. I attached a hinge to the back and velcro tabs to keep it closed.
I carved a wooden rod on the lathe and used smaller rods, missiles, bombs and fuel tank. I used epoxy and super glue to attach them.


The next big challange was to figure out how to create functional wheels with the look of landing gear and in the same size proportionally. Rollerblade wheels fit the bill. I took aluminum u channel and aluminum rod and sunk them deep into the plane through an embedded wood block and layers of epoxy resin. I took epoxy clay and wires to create the look of landing gear and finished them with a coat of black paint.


Finally, the final coat of gray primer and clear coat and the decals are ready to put on. I designed some decals with Photoshop and brought them to the local sign shop to be made into high grade vinyl stickers…

Finally, 100 hours later (It took most the month of April!) It was ready to deliver…. Yeah!!!!


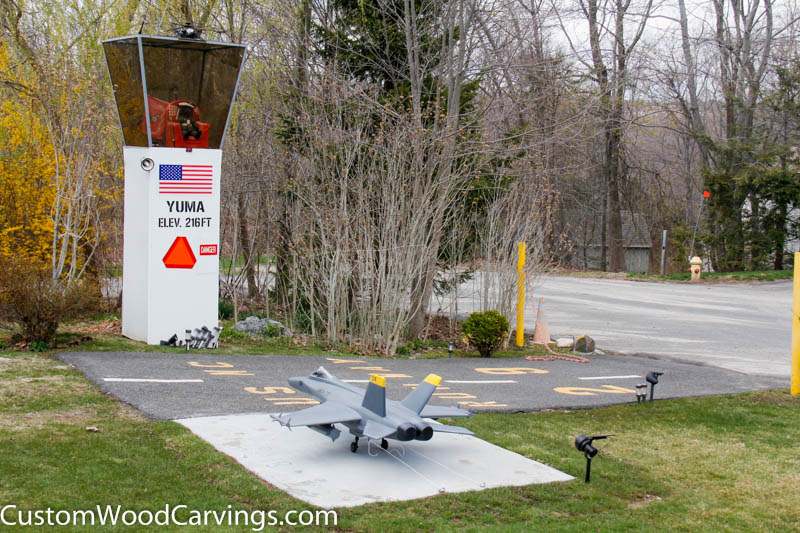
Here is it’s final location on the small airplane strip in the customers yard…


Thanks for looking! If you would like to get in touch, visit http://www.customwoodcarvings.com and click the contact page. If you enjoy these posts, click the ‘follow” button on the right and you will receive updates when a new piece has been posted.
“Seek ye first the Kindgom of God and His Righteousness and all these things will be added unto you.” Mathew 6
What a powerful and wonderous conditional promise from God. Let us press on in obedience so that we may experience the full measure of His promise.
Kris
Thanks for sending your e-mails. I really enjoy all the different projects you can do! You are so talented!!….Thanks
WOW! That is totally awesome. Great job!